


A sticky ball of pizza dough can turn a relaxing bake into a small crisis. It clings to your fingers, smears across the counter, and welds itself to the peel right when you’re ready to launch. Every home baker faces it eventually.
The good news is that it’s fixable, usually with small adjustments, not big ones. Once you learn what causes that tacky, glue-like texture, you can keep your dough smooth, elastic, and easy to shape every time.
1. Hydration That Matches Your Flour
Water content or “hydration” is the single biggest factor. Hydration is expressed as a percentage: water weight divided by flour weight. The higher the percentage, the wetter the dough.
Why Protein Matters
Flour protein controls how much water it can handle. More protein equals more strength, which means you can add more water without losing structure.
| Flour Type | Protein (%) | Water Absorption | Handling Notes |
| King Arthur All-Purpose | 11.7 | Moderate | Good for beginners, softer dough |
| King Arthur Bread | 12.7 | High | Holds more water, less sticky |
| Italian “00” | 11–12 | Lower | Needs gentle hydration, hot bake |
Hydration Targets by Style
- Beginner or home-oven pizza : 58–62% hydration for easy handling.
- Neapolitan-style : 60–63% (per AVPN guidance).
- New York-style : around 61–64% with bread flour and cold fermentation.
Quick Fix
If your dough feels tacky, reduce water by 2–4 percentage points next batch. Switching from all-purpose to bread flour often solves the problem instantly, since it strengthens gluten without changing flavor.
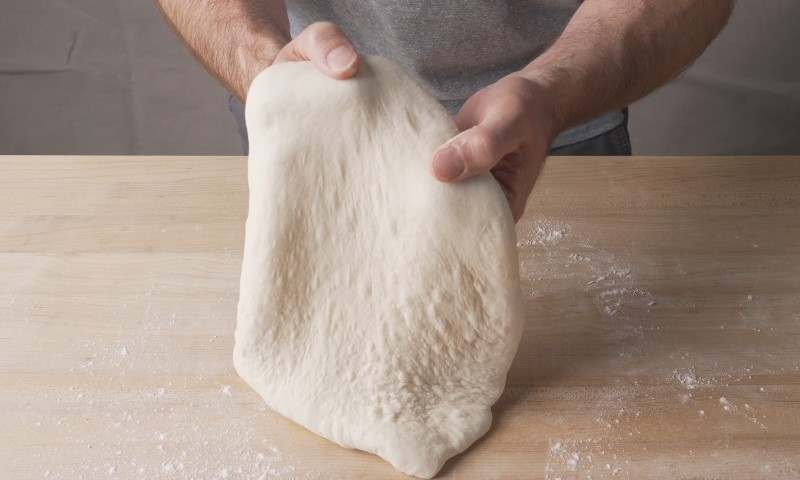
2. Building Gluten Strength
Sticky dough often means the gluten network hasn’t formed properly. Gluten gives the dough its elasticity and strength, it’s what traps gas during fermentation and gives pizza that open crumb and chewy bite.
Signs of Weak Gluten
- Dough tears easily when stretched.
- It won’t hold shape on the bench.
- It feels slack or gummy after mixing.
Solutions That Work
- Autolyse : Mix only flour and water, then rest for 20–60 minutes before adding yeast and salt. The rest jumpstarts gluten development without friction or heat.
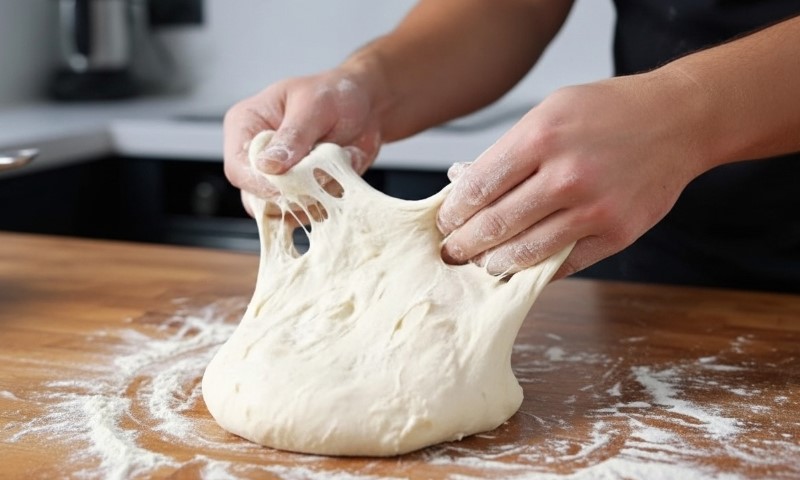
- Windowpane Test : Stretch a small piece of dough between your fingers. If it forms a thin, translucent film without tearing, you’re there.
- Short Machine Mixes : Stop mixing as soon as the dough clears the bowl and smooths out. Overmixing warms it up, which reintroduces stickiness.
Fix Summary
Add an autolyse step, knead just until smooth, and avoid overheating. Dough should feel elastic, not tacky, when properly developed.
3. Dough Temperature and Fermentation Time

A hot dough turns sticky fast. Yeast activity accelerates in warmth, which makes gluten soften and gas bubbles expand too early. Cooler, slower fermentation keeps structure intact.
Temperature Targets
- Final dough temperature : around 70–75°F (21–24°C).
- Cold fermentation window : 24 to 72 hours for most styles.
- Peak flavor and handling : often at 3–5 days (if the formula supports it).
Practical Workflow
- Mix and knead until smooth.
- Immediately refrigerate in a lightly oiled container.
- Ball after bulk fermentation.
- Bring to room temperature about an hour before baking.
Fix Summary
If your dough turns tacky during the proof, it’s too warm. Move it to the fridge, cut fermentation time, or use less yeast. Cold dough is easier to handle and tastes better, too.
4. Humidity and Flour Storage
Flour is a sponge, it absorbs moisture from the air. In humid climates, it can quietly increase in water content even before you start mixing. That extra moisture alters hydration and can push the dough into sticky territory.
Best Practices
- Store flour in airtight containers.
- Keep it in a cool, dry place (or even the fridge if humidity is high).
- Let the cold flour warm to room temperature before mixing to prevent condensation.
Why It Matters
Commercial milling specs put flour moisture around 13.5–14.5% , but a few damp summer weeks can raise that in your kitchen.
5. Peel, Bench, and Launch Technique
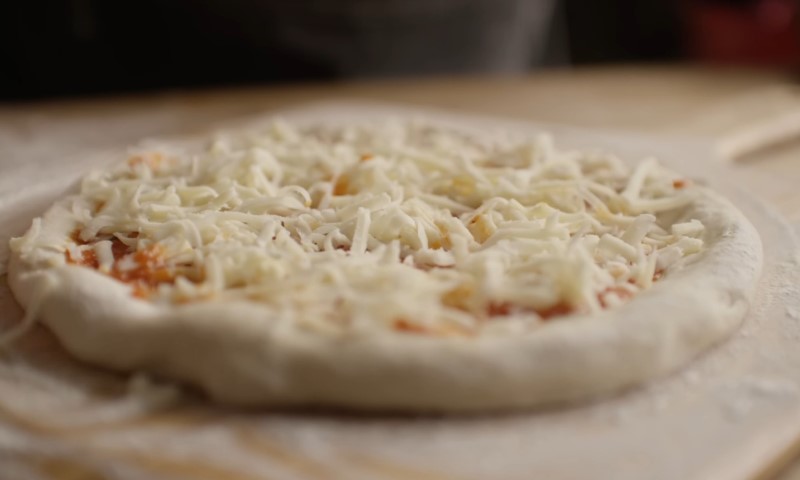
You can nail your hydration and fermentation, yet still lose the pizza to a sticky peel. Handling technique at launch matters as much as the dough itself.
Common Peel Mistakes
- Using a wet peel.
- Topping too early.
- Overloading with sauce or watery toppings.
Simple Fixes
- Dry Peel : Always wipe the peel before loading.
- Dusting : Use semolina or cornmeal; they act like micro ball bearings.
- Parchment Option : Ideal for home ovens up to 450–500°F. Trim edges to prevent burning. Slide the whole parchment sheet onto the stone, then remove it halfway through the bake if you prefer direct contact.
Pro Workflow
- Prep the peel right before topping.
- Give the pizza a small jiggle to confirm it slides freely.
- If it sticks, lift an edge and dust more semolina or blow lightly underneath.
- Launch immediately; every extra minute increases the chance of stick.
A Practical Solution Flow
You can solve nearly every sticky dough problem by following a consistent order of checks:
- Hydration vs. Flour Strength : Lower water by 2–4% or upgrade to bread flour.
- Add Autolyse : Rest flour and water 20–30 minutes before kneading.
- Develop Gluten to Windowpane : Knead or stretch-and-fold until smooth and elastic.
- Control Temperature : Refrigerate for long ferments (24–72 hours).
- Ball and Rest Properly : Tighten dough balls and let them relax under cover.
- Keep Work Surface Clean : Use a bench knife, minimal flour, and oiled fingertips.
- Test the Peel : Dry, dust, jiggle, then launch confidently.
Common Sticky Scenarios and Quick Fixes
Sticky dough can show up in different ways, from clinging to your hands to gluing itself to the peel. Each situation has a clear fix.
Scenario A: Dough Sticks to Your Hands
Too much water, weak gluten, or high dough temperature.
Fixes
- Lightly oil hands instead of adding flour.
- Use a bench knife to fold, not squeeze.
- Add a short autolyse and knead until smooth.
Scenario B: Dough Pools or Tears During Shaping
Under-kneaded, overhydrated, or overproofed dough.
Fixes
- Drop hydration by 2–4%.
- Cover and rest 10–15 minutes before retrying.
- Keep dough cool during handling.
Scenario C: Dough Sticks to the Peel
Wet peel, excess toppings, or slow launch.
Fixes
- Wipe peel dry before loading.
- Use semolina or parchment.
- Top quickly and launch immediately.
Scenario D: High-Hydration Dough Feels Unmanageable
Hydration beyond your current workflow.
Fixes
- Train with 60% hydration first.
- Use stretch-and-folds and oiled hands.
- Avoid excessive bench flour—it burns later.
Scenario E: Dough Turns Sticky After Cold Proof
Overfermentation or condensation.
Fixes
- Shorten fridge time to 2–3 days.
- Rest cold dough 20–30 minutes before shaping.
- Reduce yeast slightly next batch.
Style-Specific Adjustment Guides
Each pizza style behaves differently. Hydration, flour type, and handling all shift slightly, so tailor your approach to the style you’re baking.
Neapolitan
- Hydration: 58–63%.
- Ingredients: Only flour, water, salt, yeast.
- Technique: Long fermentation, hot bake, minimal toppings.
- Sticky Control: Keep hydration moderate, ball tightly, limit bench time. Launch fast on a dry, dusted peel.
New York-Style
- Hydration: Low 60s.
- Extras: Oil and sugar improve color and handling.
- Cold Ferment: 2–4 days in fridge for flavor and flexibility.
- Sticky Control: Chill well, rest covered before shaping, keep peel dry.
Pan or Sicilian
- Hydration: Higher, but tamed by oil.
- Handling: Proof and bake in the pan itself.
- Sticky Control: Use oiled hands, not flour. Never drag raw dough across a dry surface.
Tools and Materials That Help
| Tool | Purpose | Why It Helps |
| Bench Knife | Lift and fold dough | Keeps hands cleaner |
| Digital Scale | Precise hydration | Prevents hidden excess water |
| Infrared Thermometer | Tracks dough and oven temps | Avoids overheating |
| Bread Flour | Higher protein | Tolerates more water |
| Semolina Flour | Peel dusting | Prevents stick, adds texture |
Peel, Stone, and Parchment in Practice

- Wood Peels release dough better during launch because the grain absorbs minor surface moisture.
- Metal Peels are ideal for turning pizzas mid-bake or retrieving them cleanly.
- Parchment Sheets make training easier for beginners. Most home ovens stay below 500°F, which is within safe limits. Trim the edges and remove the paper halfway through if you prefer direct heat contact.
Semolina, cornmeal, or even a 50/50 blend of both works as a low-friction layer between the dough and peel. They create a granular barrier that allows a smooth slide without overflouring.
Bench Technique That Keeps Dough Manageable
- Flour Lightly, Not Heavily : A dusting, not a layer. Too much burns on the stone.
- Use a Bench Knife : It slides under sticky spots without tearing.
- Oil Fingertips : Especially helpful for wetter doughs.
- Work from the Center Out : Preserve the rim.
- Jiggle Before Topping : If it doesn’t move freely, fix it now—never on the peel.
Cold Fermentation for Better Handling
Long, cold fermentation isn’t only about flavor. It tightens the dough structure and improves handling dramatically. Most pros aim for 48 to 72 hours , depending on yeast load and temperature.
During that time, gluten relaxes, gas forms evenly, and the dough dries slightly at the surface, reducing stickiness. After refrigeration, always let it rest covered for 20–30 minutes before shaping to avoid tearing or stiffness.
Quick Reference Table
| Problem | Primary Cause | Immediate Fix | Next-Batch Adjustment |
| Dough sticks to hands | Hydration too high, weak gluten | Oil hands, use bench knife | Reduce water 2–4% or switch to bread flour |
| Dough puddles on bench | Under-kneaded, warm, or overproofed | Rest covered 10–15 min | Add autolyse, shorten yeast, cold ferment |
| Dough sticks to peel | Wet peel, slow launch | Dry peel, dust semolina | Train with parchment, use wood peel |
| Sticky after cold proof | Overfermentation, condensation | Rest 20–30 min before shaping | Reduce yeast, shorten fridge time |
| High-hydration dough | Mismatch of technique and hydration | Wet hands, stretch-and-folds | Start near 60% hydration, raise gradually |
Baseline Formulas That Resist Stickiness
View this post on Instagram
A few reliable dough formulas make handling easier. These ratios balance hydration and strength, giving you smooth, non-sticky results.
New York-Style (About 61% Hydration)
- Flour: 100% (bread flour preferred)
- Water: 61%
- Salt: 2%
- Instant Yeast: 0.3–0.5%
- Oil: 1.5–2%
Method
Combine flour and water, rest 20 minutes. Add salt, yeast, and oil. Mix until smooth. Refrigerate 48–72 hours. Ball and rest at room temperature for 1 hour before shaping.
This formula balances flavor, stretch, and handling for most home setups.
Neapolitan-Lean (About 60–62% Hydration)
-
- Flour: Italian “00”
- Water: 60–62%
- Salt: 2–3%
- Yeast: Pinch of instant or fresh
Method
Mix gently, knead until smooth, ferment long and cool. Bake very hot, ideally on stone or steel.
Final Checklist Before Your Next Mix
- Choose the right flour for your hydration target. Bread flour holds water better than all-purpose.
- Start around 60–62% hydration until you’re confident with peel work.
- Add a short autolyse to build structure early.
- Cold ferment for at least 24 hours, ideally 2–3 days.
- Ball tightly and keep covered during rests.
- Work on a clean, lightly floured bench.
- Keep the peel dry, dusted, or lined with parchment.
- Always test the jiggle before launching.